Introduction to Directory Privacy in cPanel
Directory Privacy is a powerful feature within cPanel that allows you to protect specific directories in your hosting account. This security tool is essential for managing access to certain parts of your website, ensuring that sensitive information remains confidential. By setting up Directory Privacy, you can control who views the content of specific folders on your site by requiring a username and password to access them. Whether you’re handling personal data, protecting client information, or securing an admin area, Directory Privacy is a tool that enhances your site’s security and privacy.
Quick Start Guide to Directory Privacy
This Quick Start Guide to Directory Privacy guide is designed to provide you with a straightforward, step-by-step approach to securing your website’s directories. Whether you’re a website owner, a developer, or just someone looking to enhance the security of sensitive online content, this guide will walk you through the essential steps of setting up Directory Privacy in cPanel.
Setting Up Directory Privacy
Step 1: Accessing the Feature
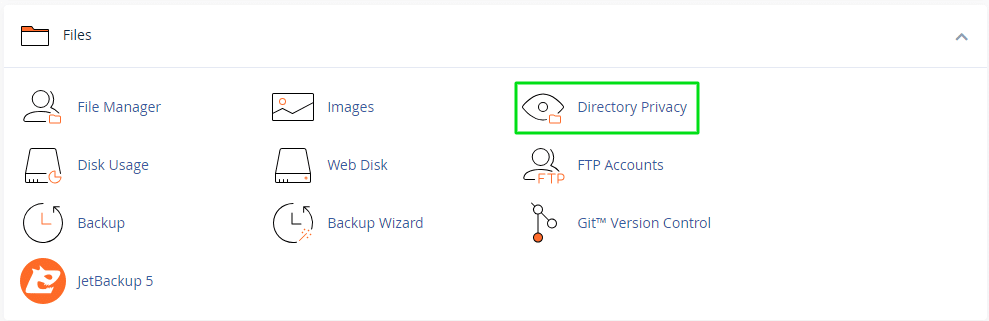
- Navigate to Directory Privacy
- Once logged into cPanel, find the ‘Directory Privacy’ icon under the ‘Files’ section.
Step 2: Selecting a Directory
- Choose the Directory to Protect
- Browse through your file hierarchy and click on the name of the directory you wish to protect.
Step 3: Enabling Privacy
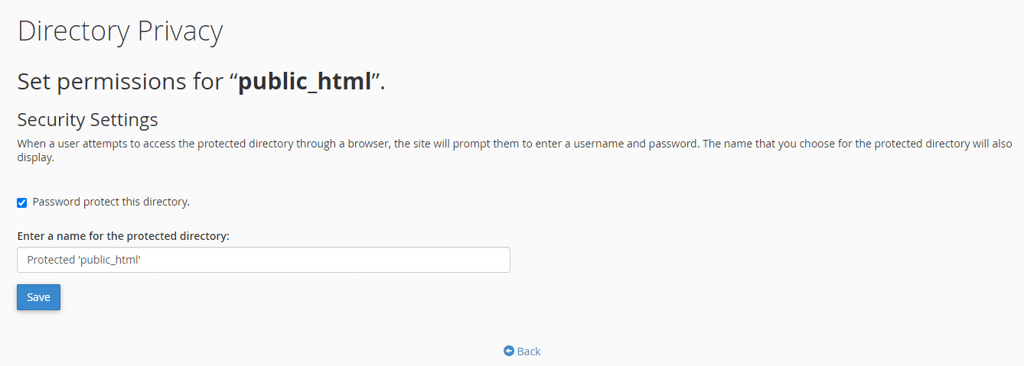
- Secure the Directory
- Check the box to ‘Password protect this directory’. Enter a name for the protected area. This name is displayed when the login prompt appears.
Step 4: Creating User Access
- Set User Permissions
- Scroll down to ‘Create User’. Enter a username and password for the user who will have access to the directory.
Once Directory Privacy is configured in cPanel, a .htaccess file is created in the protected directory. This activates access control that requires users to authenticate with the username and password you have configured. Unauthorised access attempts are denied, ensuring that only credentialed individuals can view or use the content in the secured area.
Configuring Directory Privacy adds a significant layer of security, controlling who can view or access the content within a specific directory on your website. This feature is particularly useful for protecting sensitive data or limiting access to certain areas of your site.
Removing access control
Removing access control that has been set up via Directory Privacy in cPanel is a straightforward process. Essentially, you need to reverse the steps you took to establish the privacy settings. Here’s how to do it:
- Log into cPanel: Access your cPanel account with your usual login credentials.
- Navigate to Directory Privacy: Locate the ‘Directory Privacy’ option under the ‘Files’ section in your cPanel dashboard.
- Select the Protected Directory: Browse through the file structure and click on the directory from which you wish to remove the access control.
- Disable Protection: Once you are in the settings for the selected directory, uncheck the option that says ‘Password protect this directory’. This action will disable the authentication requirement for the directory.
- Save Changes: After unchecking the protection option, make sure to save the changes. cPanel will automatically update the
.htaccessfile in the directory, removing the lines that enforce the access control. - Optional: Remove Users: If you want to completely remove the setup, consider also deleting any users you had created for accessing the protected directory. This can be done in the same Directory Privacy interface where you manage users for each protected area.
Once these steps are completed, the directory will no longer require a username and password for access, effectively removing the previously set up access control. Remember, it’s important to ensure that the directory does not contain sensitive information that should be protected before removing such security measures.
Further details on Using Directory Privacy
Understanding Your Options
- Detailed Options in Directory Privacy
- When you enable Directory Privacy, a
.htaccessfile is automatically created in the chosen directory. This file contains the necessary configurations to restrict access. Understanding the.htaccessfile is beneficial for advanced users who may wish to customize their security settings further.
- When you enable Directory Privacy, a
Example Use-Cases
- Practical Applications
- For instance, if you’re running an e-commerce site, you might protect a directory containing your product database or customer information. By setting up Directory Privacy, only authorised personnel can access these sensitive directories, adding an extra layer of security.
Managing Users and Permissions
- Handling Multiple Users
- You can add multiple users with different access credentials for the same directory. This is particularly useful for collaborative environments where different team members require access to specific resources.
Tips for Strong Security
- Ensuring Optimal Protection
- Always use strong, unique passwords for directory access. Regularly update these passwords and monitor who has access to ensure your site remains secure.
Detailed Information – Understanding the Effects of Configuring Directory Privacy in cPanel
Once Directory Privacy is configured in cPanel, several key changes occur to ensure the security and restricted access of the specified directory:
- Creation of
.htaccessand.htpasswdFiles: cPanel automatically generates a.htaccessfile in the protected directory. This file contains the necessary directives to enforce access restrictions. Additionally, a.htpasswdfile is created, storing the usernames and hashed passwords of authorised users. - Access Control Activation: The settings in the
.htaccessfile activate access control for the directory. When someone attempts to access the protected directory via a web browser, the server checks the.htaccessfile to determine if the directory is restricted. - Authentication Prompt: If the directory is protected, the server prompts the user for a username and password. This prompt is usually a simple dialogue box that appears over the web page, displaying the name of the protected area (as set up in cPanel).
- User Credential Verification: The entered credentials are compared against the information in the
.htpasswdfile. If the username and password match an authorised user, access is granted. - Restricted Access: If the credentials do not match or if the user clicks ‘Cancel’ on the prompt, access to the directory is denied. The user might see an error message like “401 Unauthorised” or “Access Denied.”
- Logging Attempts: Depending on the server configuration, access attempts (both successful and unsuccessful) may be logged. This can help website administrators monitor for unauthorised access attempts.
- Browser Caching: Once a user successfully logs in, the browser may cache the credentials for that session, allowing the user to navigate the protected area without repeated prompts. However, once the browser is closed, the session usually ends, and the user will be prompted again for credentials on their next visit.
- Impact on Subdirectories: If a parent directory is protected, its subdirectories are also protected under the same credentials unless specifically configured otherwise.
Summary
In conclusion, Directory Privacy in cPanel is a straightforward yet powerful tool for enhancing the security of your website. By following the steps outlined in this guide, you can effectively manage access to sensitive areas of your site, protecting both your data and your users. Remember, security is an ongoing process, and regularly updating your settings is crucial for maintaining a robust defence against unauthorised access.
