Smarthost offers seamless integration to cPanel, one of the most popular hosting control panels. This integration facilitates effortless management of hosting accounts. This article will guide you through the straightforward process of logging into cPanel directly from the SmartHost customer portal. By understanding this, you can take advantage of the centralised features and ensure smooth operations for your website or business.
Quick Access
Step-by-Step Guide to Logging in to cPanel from the SmartHost Customer Portal:
- Access Your SmartHost Client Area:
- Open your preferred web browser.
- Navigate to the SmartHost customer portal login page at https://portal.smarthost.ie
- Enter your registered email address and password.
- Click on the “Login” button.
- Navigate to the Services Section:
- Once logged in, locate the “Services” tab at the top of your dashboard.
- Click on it to view a list of your active services.
- Select Your Hosting Account:
- Browse through your active services to find the hosting account associated with the cPanel you wish to access.
- Click on the relevant service (the 3 dots to the right of the service is the best place to access this).
- Access cPanel Directly:
- On the service details page, you will see an “Actions” sidebar on the bottom right of the menu – you need to scroll right down to see it.
- Click on the “Login to cPanel” button. This will automatically log you into your cPanel account without the need for additional credentials.
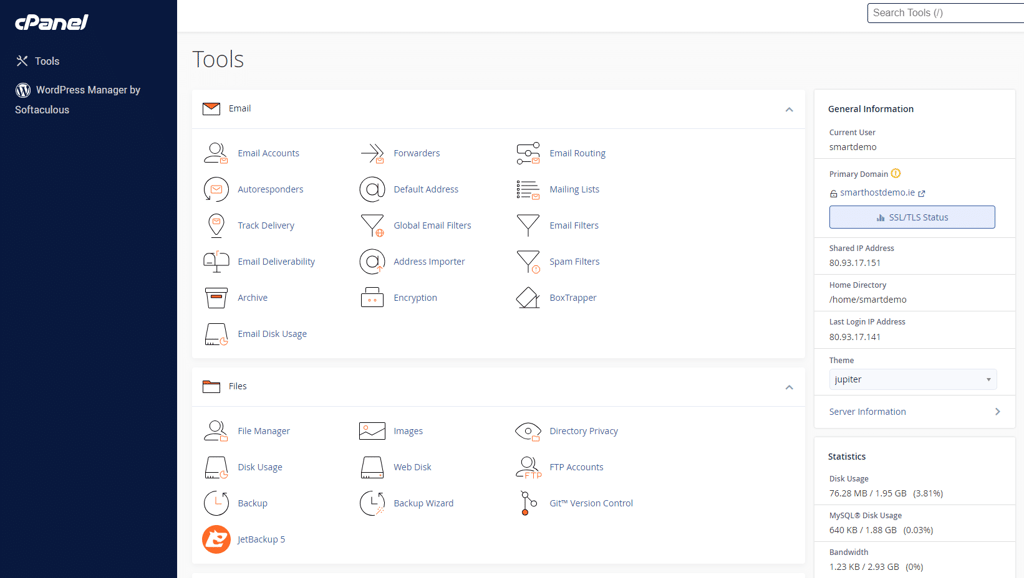
- Explore cPanel:
- Once in cPanel, you can manage your files, databases, email accounts, and more, all from one intuitive interface.
Detailed Information
Step 1. Log in to your Customer Account
What is the SmartHost Client Area
The SmartHost client area is the customer portal provided by SmartHost. The client area is a web-based interface where SmartHost customers can manage their hosting accounts, billing and payments, support requests, and access other features related to their accounts.
Follow these steps to log in to the SmartHost Client Area:

Go to the Client Area Login page, by clicking here, or by going to SmartHost.ie, and selecting the “My Account” option at the top right of the web page
You will then be presented with a login screen. Here you can log in to your SmartHost client account. Enter your email address and password. you can request a password reset if you have forgotten or misplaced the password. Your username is the email address you used when you created the account with SmartHost.

Click “Login” to access your Client Area.
You are now logged in to the SmartHost Customer Portal, where you can manage all aspects of your account with us.
Common Problems:
Forgot Password – If you have lost or forgotten your password, you can request a reset here. You will need to enter the email address you used during your initial signup.
Unknown Two Factor – If you are asked for your two-factor authentication codes by the login form, enter the six-digit code from your SmartPhone. You should save a backup code in case you are unable to find it. If you are still having trouble gaining access, you can send an email to support@smarthost.ie using the same email address that you used to log in.
Incorrect Captcha – We use Google’s Invisible Captcha to provide added security on our login page. If you’re getting this error, it means Google was unable to verify your browser window. Try refreshing your browser page or opening an incognito tab (in Google Chrome) and logging in that way.
Step 2 – Logging into cPanel
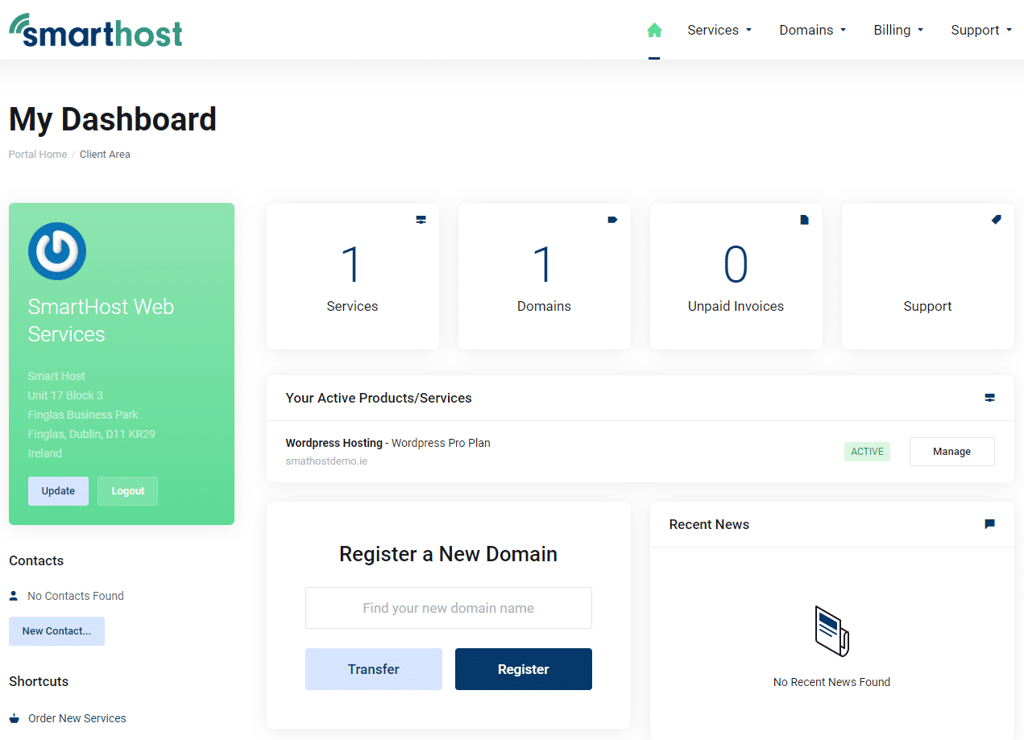
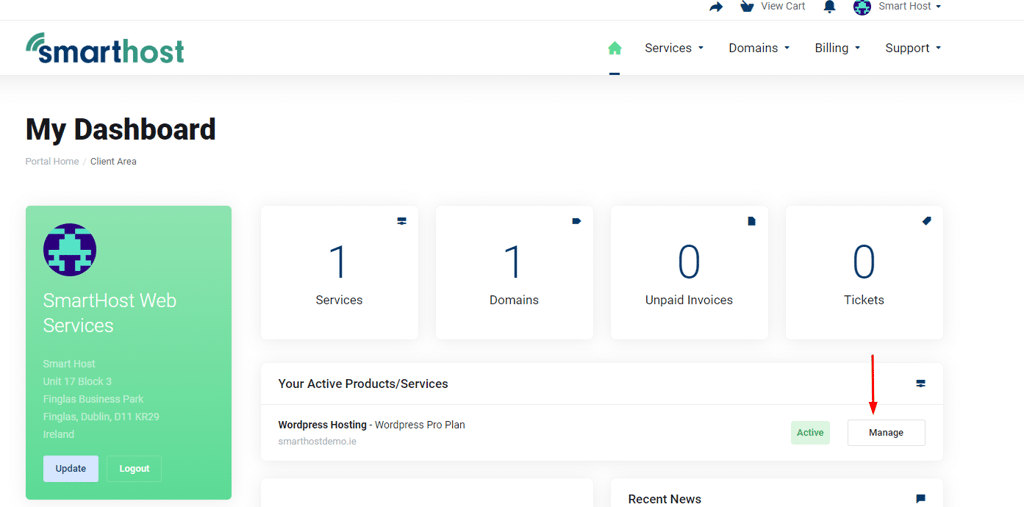
Now that you are logged in to the SmartHost Customer Portal, you can navigate to your hosting account settings.
To do this, click the “Manage” button to the right of your service in the “Your Active Products/Services” section. (Access to the same area can be achieved from the Services Menu, or by clicking the Services box at the top of the screen).
Presented are most of the available options to facilitate managing your cPanel account. You can manage your account from this section, or if you prefer – and we recommend – you can access the cPanel system directly to perform and carry out the management of your account, such as setting up email addresses, creating databases, etc.
Step 3 Access cPanel
Now scroll to the bottom of the Services screen, and you will see

You will now be taken to a new screen that presents all of the options available to you.
Now that you are logged in to cPanel, you can manage your account fully. Check our Knowledgebase articles for an explanation of these topics