Introduction to Account Security and Single Sign-On
The SmartHost Customer Portal offers enhanced security features, including Account Security and Single Sign-On (SSO) functions. This guide provides straightforward steps to manage your account’s security efficiently. SSO allows seamless integration with third-party applications, enabling you to access your billing account without repeated authentication. It’s a convenient feature for those who use multiple services but also requires careful consideration regarding access to sensitive billing information.
Enabling Single Sign-On
Step-by-Step Instructions:
- Log In: Access the Customer Portal at SmartHost Customer Portal.
- Access Account Security: On the portal’s menu, locate and click on
[Your Name]. Then, selectACCOUNT SECURITYfrom the dropdown menu.
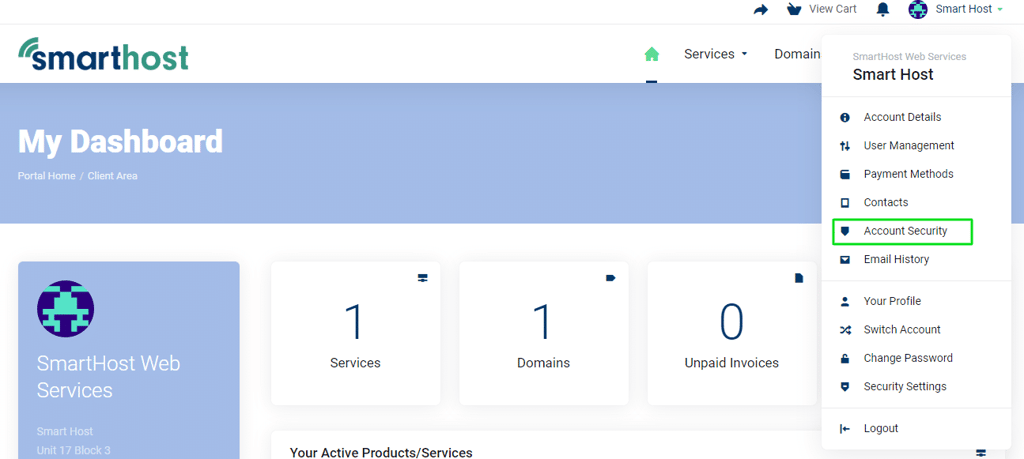
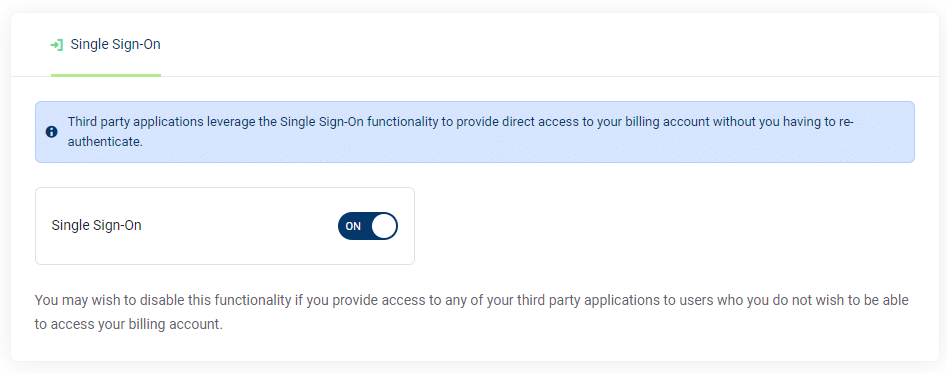
- Activate Single Sign-On: In the Account Security section, find
Single Sign-On. Check the box to enable it, or toggle to disable it. Your Single Sign-On feature is now activated or deactivated.
Further Reading
Understanding Single Sign-On (SSO) in the SmartHost Customer Portal
What is Single Sign-On?
Single Sign-On (SSO) is a user authentication service that permits a user to use one set of login credentials (e.g., name and password) to access multiple applications. For SmartHost users, SSO means simplified access to billing accounts through third-party applications, enhancing both convenience and efficiency.
The Advantages of Using SSO
- Convenience: SSO reduces the number of passwords you need to remember, allowing for a smoother, more integrated experience across services.
- Time-Efficient: It saves time by reducing the need for repeated logins when accessing your billing information.
- Reduced Password Fatigue: Lessens the likelihood of password fatigue, which occurs when having to remember numerous login details.
Considerations Before Enabling SSO
- Security: While SSO offers convenience, it’s crucial to consider the security implications. By consolidating access, you’re also potentially increasing risk if credentials of other systems, such as your SmartHost cPanel account are compromised.
- Access to Sensitive Information: Enabling SSO means that anyone with access to your SSO credentials can view your billing information. Ensure that your primary login details are secure and shared judiciously.
How to Enable SSO in the SmartHost Customer Portal
- Secure Login: Start by logging into the SmartHost Customer Portal. Ensure your connection is secure and private to prevent unauthorized access.
- Navigate to Account Security: Once logged in, your name appears in the top menu bar. Click on your name and then choose
ACCOUNT SECURITYfrom the dropdown options. - Enable SSO: In the Account Security settings, locate the Single Sign-On option. By checking this box, you enable SSO for your account. Be mindful of the security considerations before enabling this feature.
Final Thoughts
Single Sign-On provides a streamlined way to manage access to your billing information on SmartHost. It’s an effective tool for enhancing user experience while maintaining the necessary security standards. When enabled, ensure regular monitoring of your account for any unusual activity and maintain robust security practices for your primary login credentials.
Frequently Asked Questions – Account Security
Single Sign-On is a feature that allows you to access multiple applications or services using one set of login credentials, specifically for integrating your SmartHost account with third-party applications.
To enable SSO, log into the Customer Portal, go to the ‘Account Security’ section, and check the box for Single Sign-On. This will activate SSO for your account.
SSO is designed to be secure, offering a convenient way to access multiple services with one set of credentials. However, it’s important to use strong, unique passwords and exercise caution, as SSO links multiple services to a single login.
